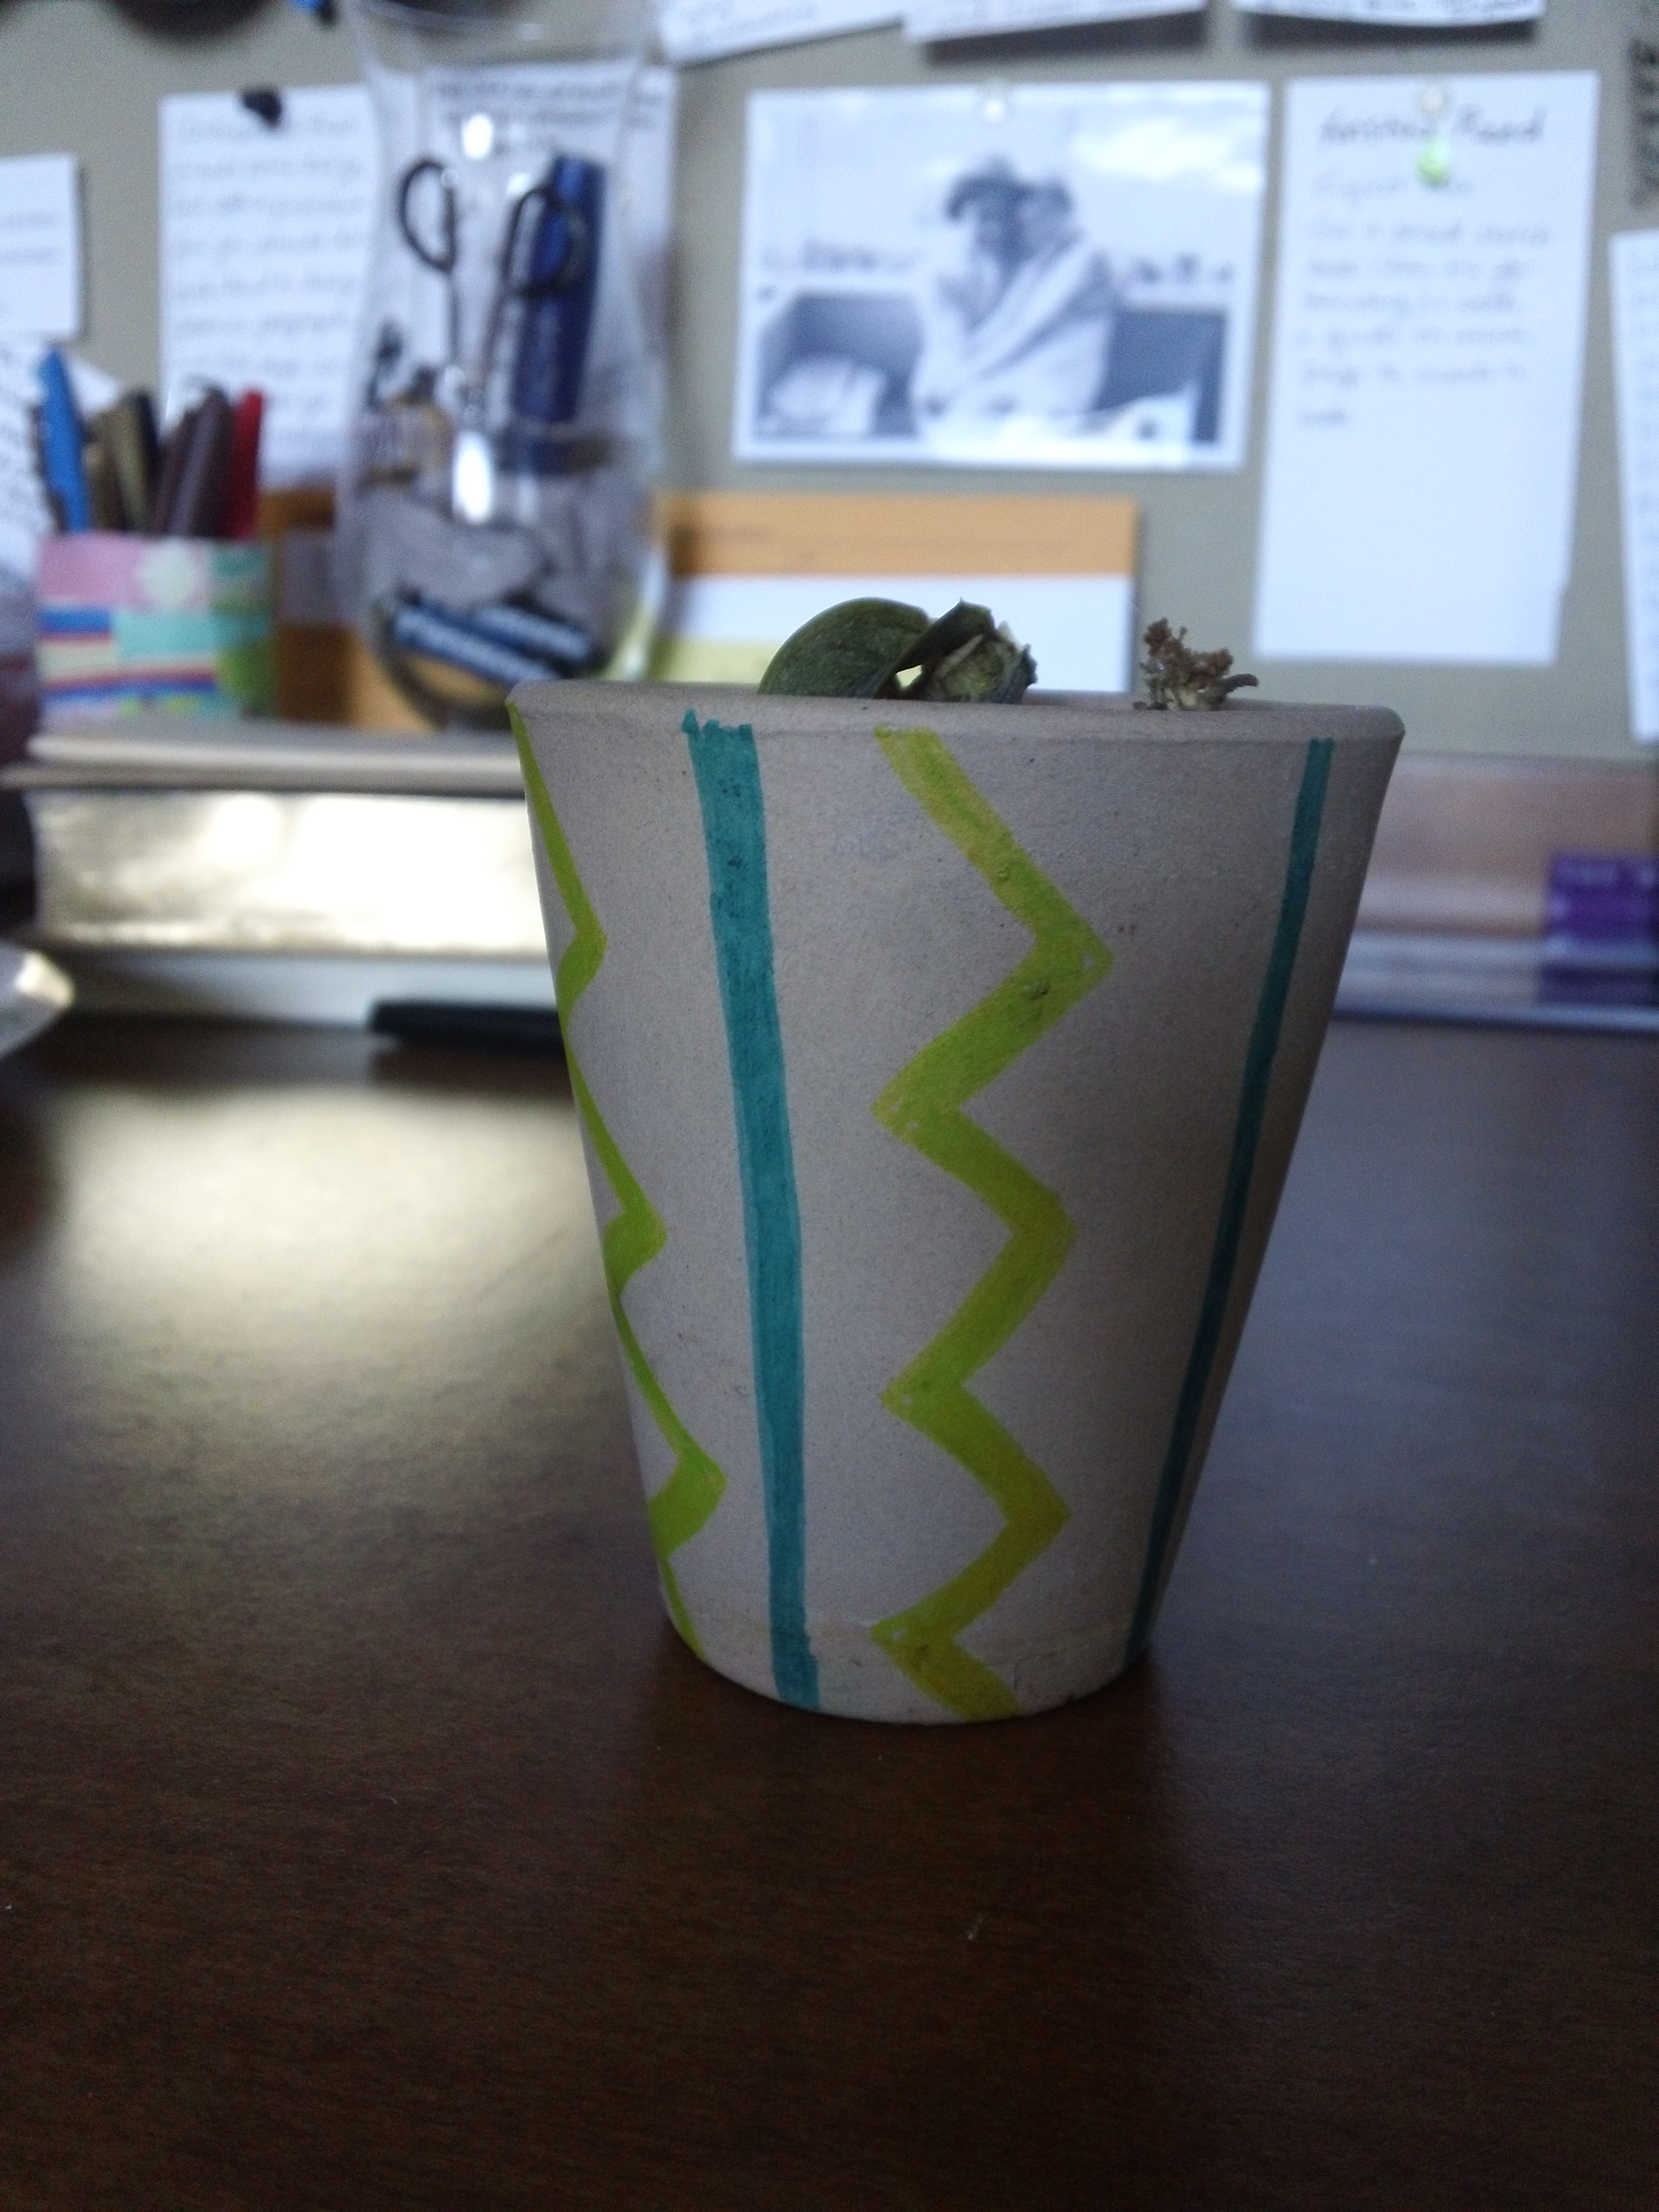
I was looking for a quick and easy DIY project, and realized my planting containers could use a little pattern and color. This project was really easy! I would give a tutorial, but there isn’t really much to this project at all. It took 10 minutes maximum to do both of these.
 For the first one, I just took the original pot, wiped it off a little, then used two sharpies (yellow and turquoise) to create a zig-zag/stripe design. I love the added pop of color it gives my desk area.
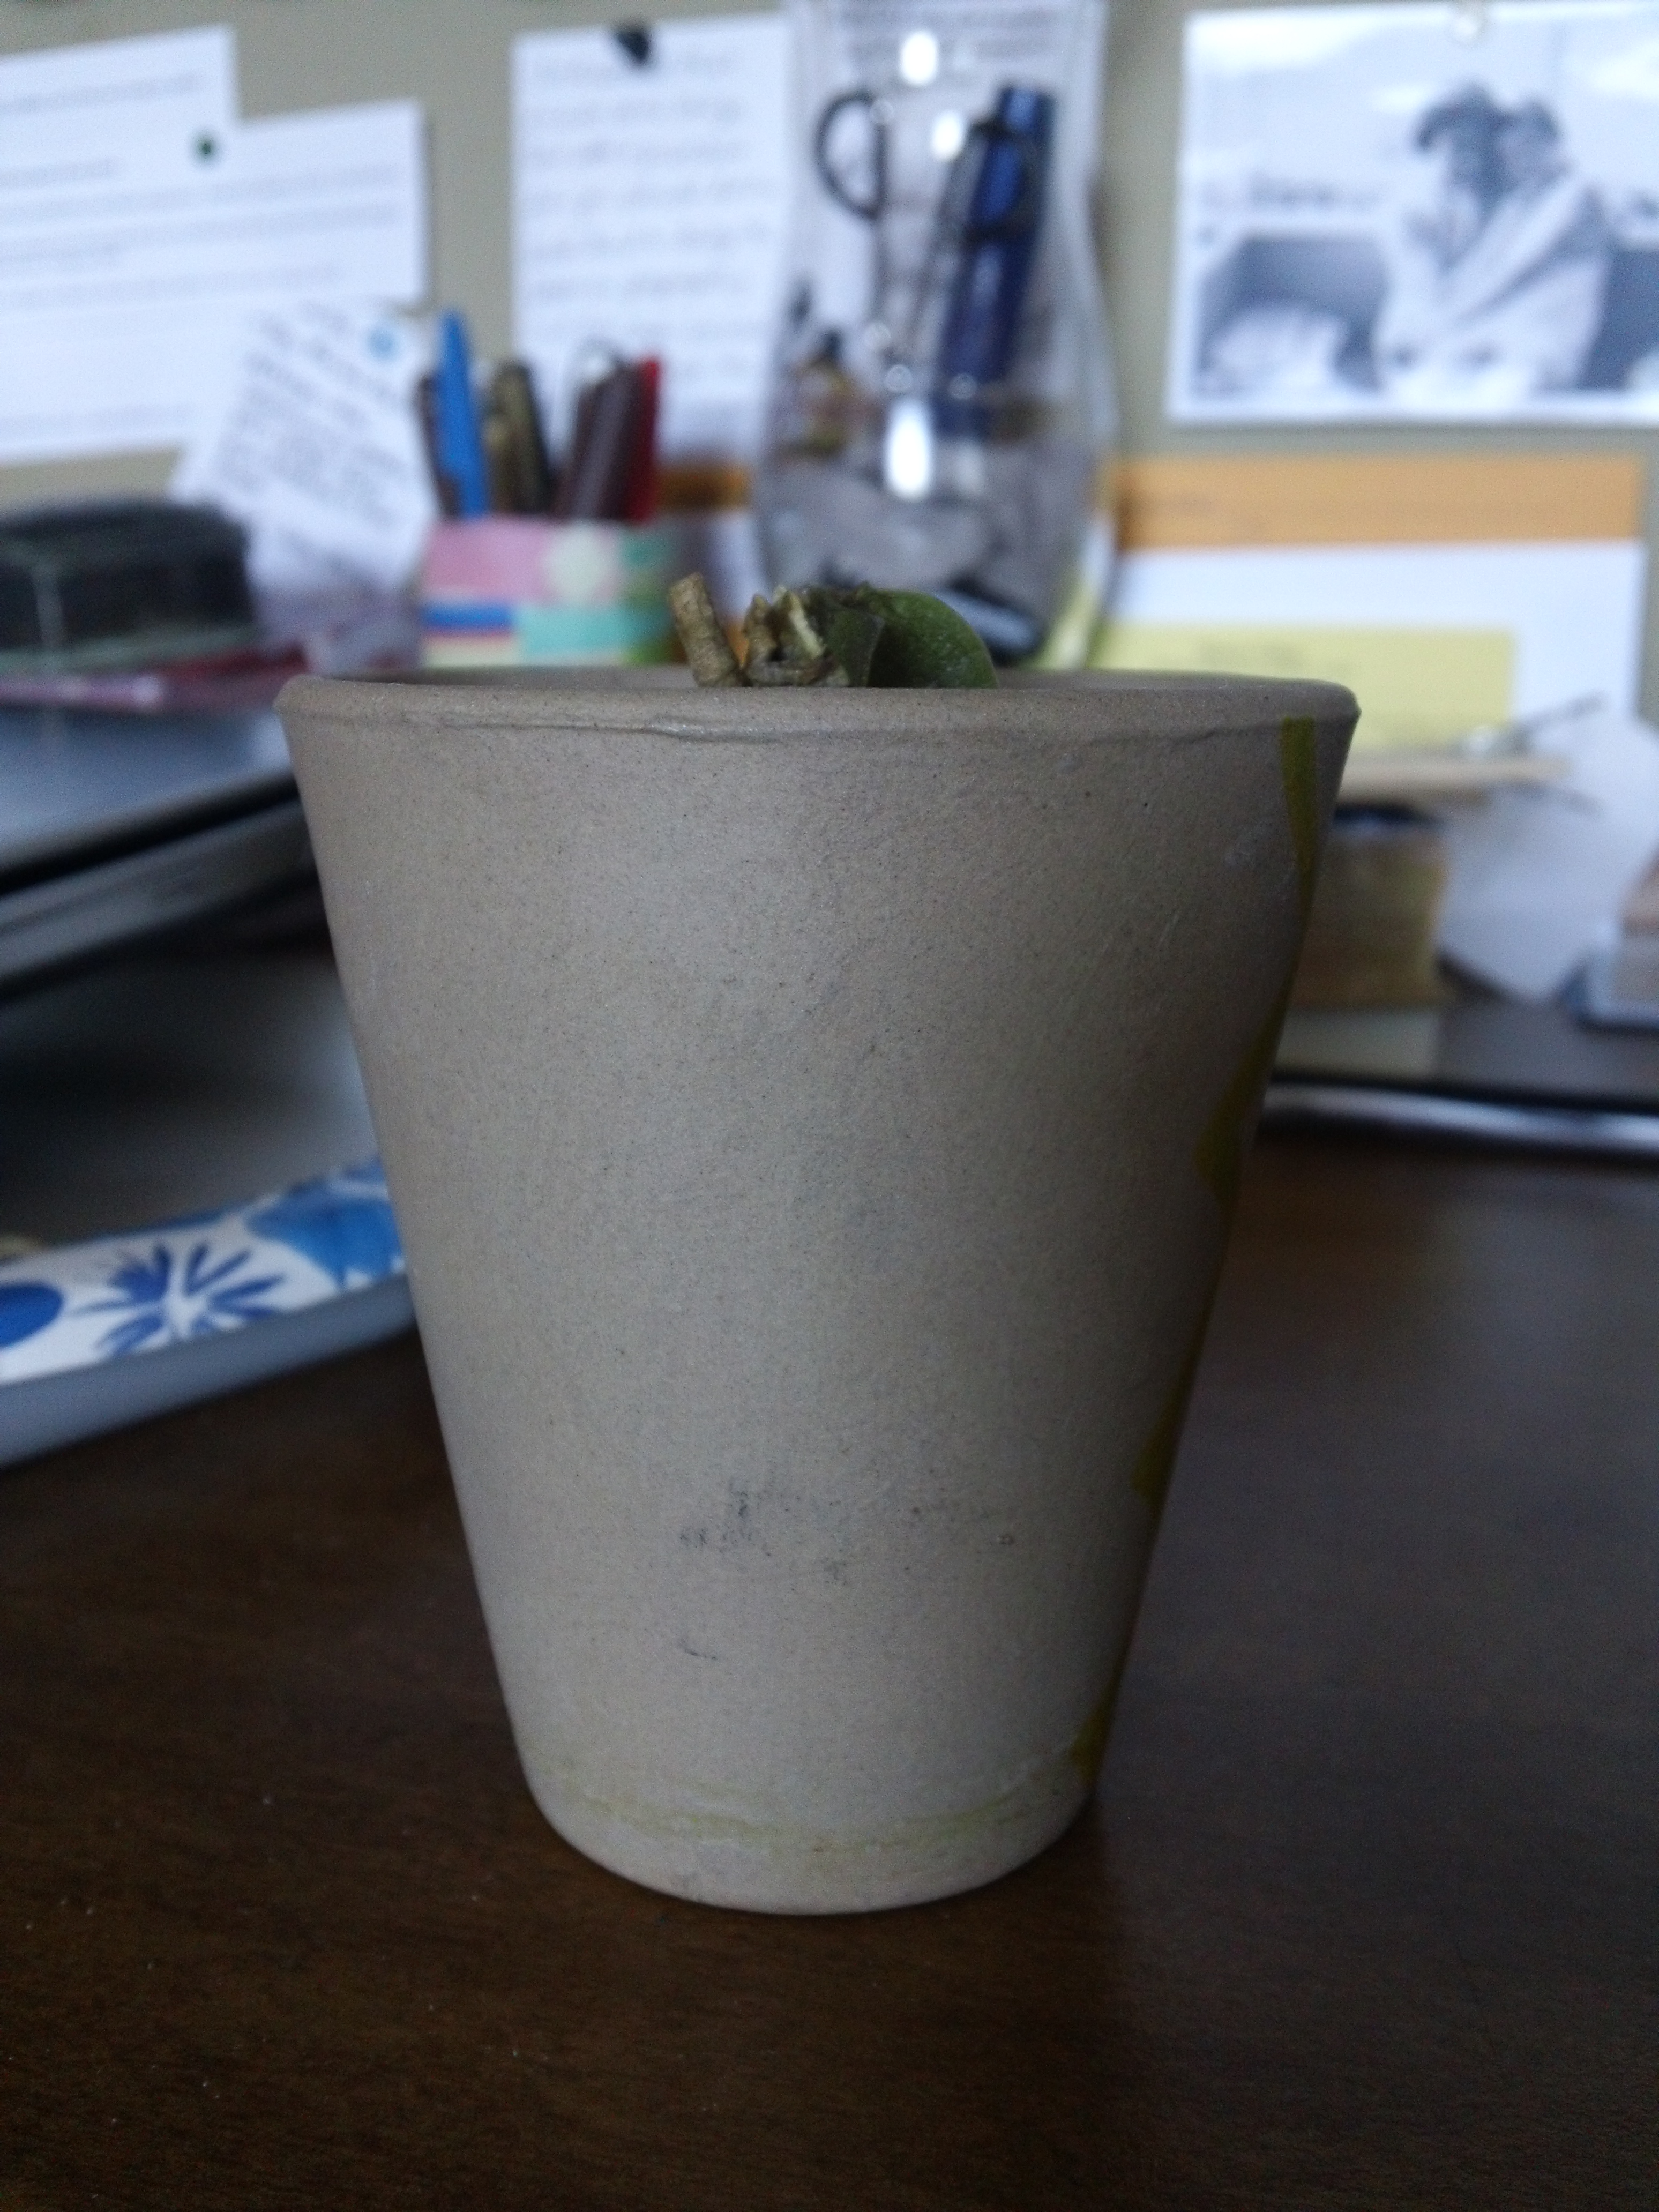
 As you can probably tell, this plant isn’t doing so well. It’s a ‘Super Mini Phalaenopsis Orchid’. I got it last year for my birthday and it hasn’t bloomed since then. The leaves, however, were really healthy until recently. Usually, the plant can go at least a week without watering, but it really didn’t fare well over my February break (maybe because it is so hot and dry in our room?) and lost all of its leaves, other than one little leaf, which was healthy at first, but is now really wilting. If anyone knows how to save this plant, please let me know!
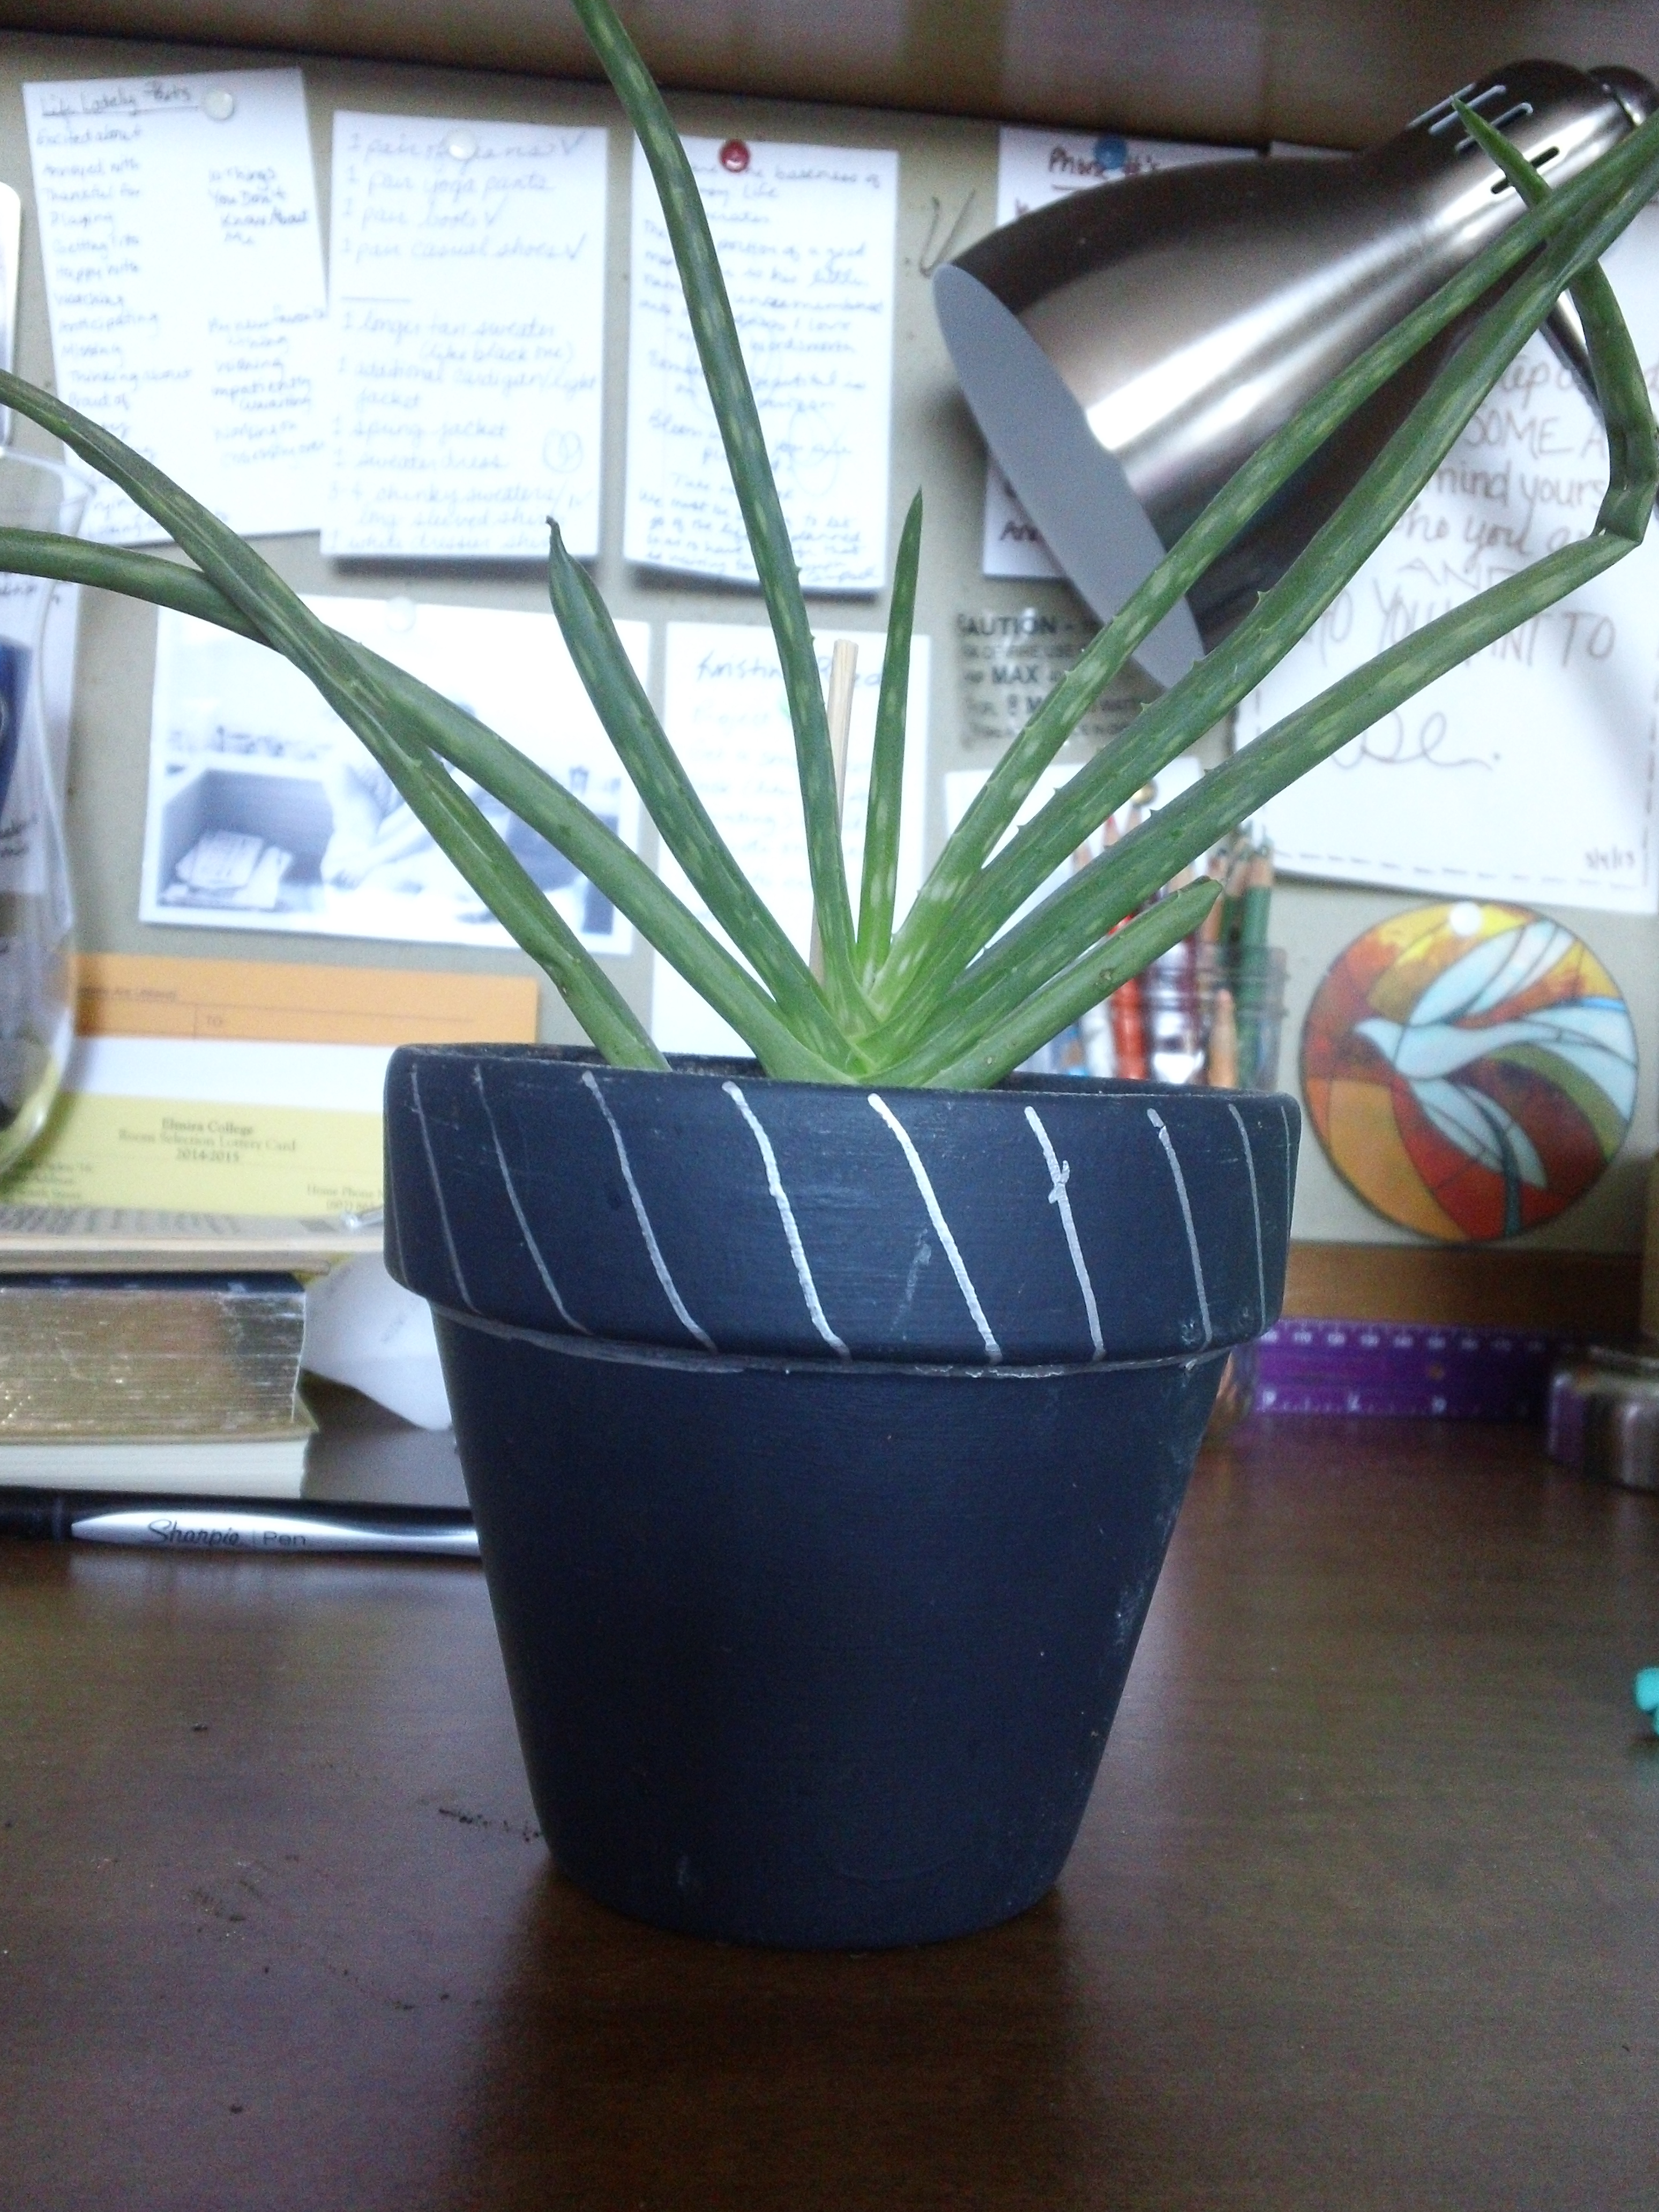
 The second pot was already painted and I have always loved the color. It’s a sort of charcoal color. Some of the paint had chipped beneath the lip of the upper rim, so I decided to hide that and add some pattern on the top. I used a Sharpie Silver Metallic marker to add some slanted stripes. I really like how this is a really simple update, but adds a lot.
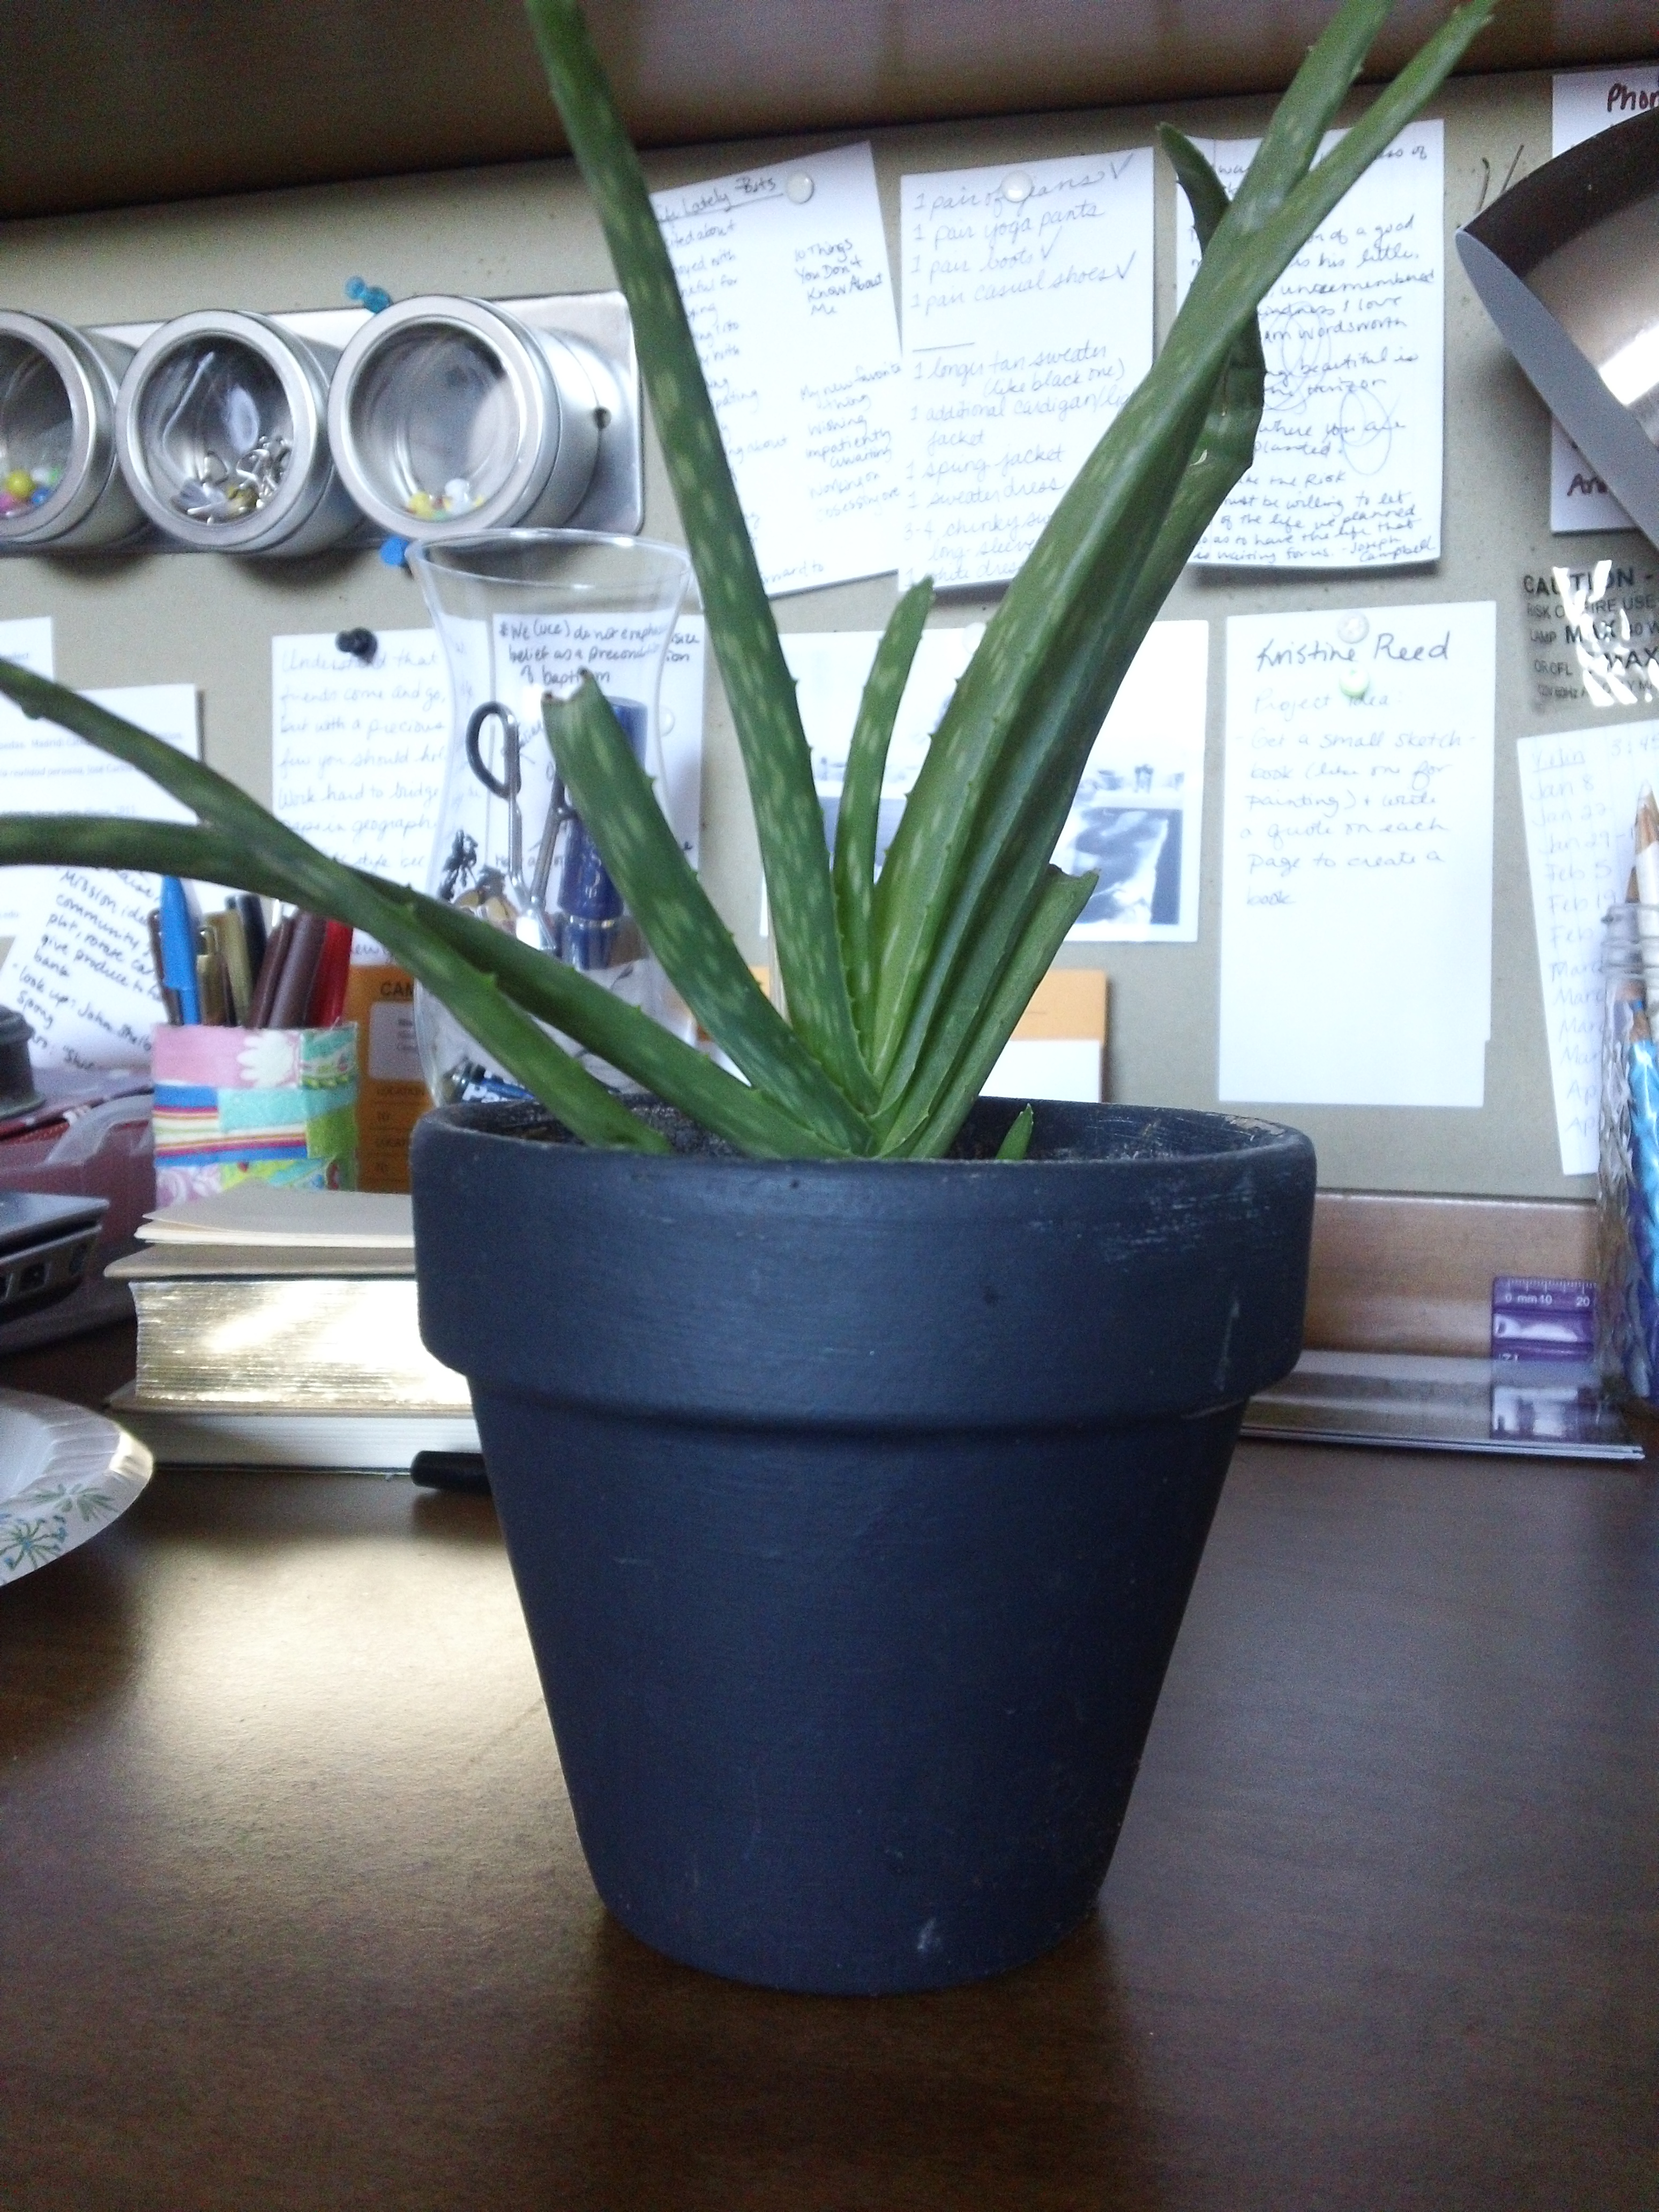
 As you can see, I have been able to keep my aloe plant healthy! This plant was not looking so great when I first brought it to college this fall. We had just transplanted it from a larger plant and it was a little weak, but it has thrived.
I’m hoping to share my desk area soon, along with some other minor updates to my dorm room that have changed since the beginning of the year.
